In case you didn’t know, there is quite the following surrounding Harley FXR models. These bikes have seen quite resurgence in recent years. At an even more granular level of fandom are those who pine after the FXRP or Pursuit Glides. These motorcycles were made for police duty and when were retired, many were chopped up into to custom bikes. There are few survivors in original condition.
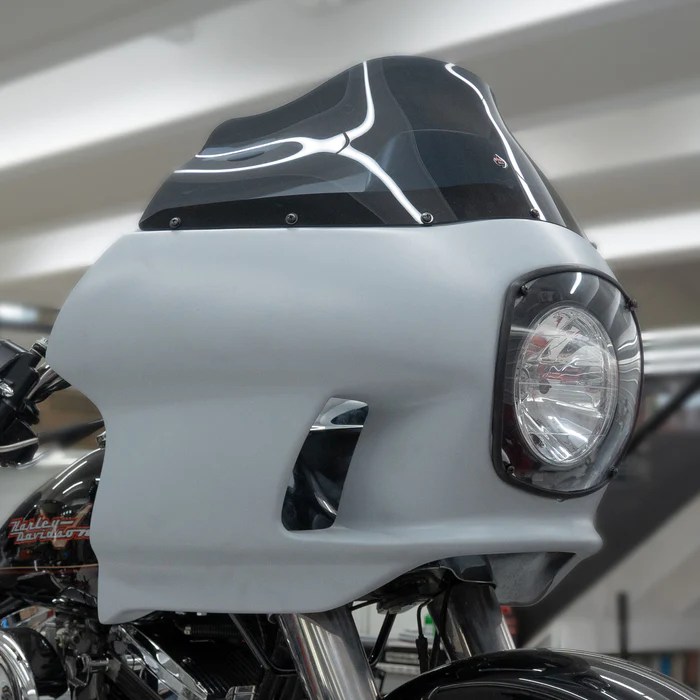
One component that made the FXRP stand out was its fairing. The FXRP fairing was truly unique and has become a desirable style for many custom builds. Klock Werks has seen this demand grow and decided to replicate the fairing themselves. Now you can add that distinct fairing style to all sorts of Harleys, from FXR’s to modern day Softails.
In Klock Werks’ video below, you can see the process of installing the aftermarket FXRP style fairing on a new Harley Sport Glide. The fairing comes as a complete kit and has everything you need to complete the job:
- Polyester Primed Fiberglass Fairing – after test fit, it’s ready to hand to your painter
- Powder Coated Neck Bracket – unique bracketing solution for your specific motorcycle
- 7” Headlight Mount – headlight not included
- Clear Headlight Cover with Gasket
- 9” Flare™ Windshield for FXRP Style Fairings in Dark Smoke (2310-0635)
- All necessary fasteners and hardware
Before you begin, make sure you have all the necessary parts and tools. Lay out all the parts and verify that you have everything you need.
Installation Steps:
1. Prepare the Bike
- Cover the fender with a fender cover to protect it from any damage.
- Disconnect the negative battery cable.
- Remove the fairing and windshield from the bike.
2. Remove Components
- Remove the headlight and mount.
- Remove the front bolt for the gas tank.
- Remove the front motor mount bolts.
3. Install Lower Bracket
- Install the lower bracket to the frame using the hardware provided.
- Ensure the lower bracket is installed correctly and securely.
4. Install Neck Bracket
- Remove the old clamp on the neck bracket if present.
- Drop down the neck bracket.
- Place the bolt heads on the show side of the bike for accessibility.
- Tighten the neck bracket and motor mount bolts to the specified torque specifications.
5. Install Upper Bracket
- Install the upper bracket using the provided hardware.
- Ensure the upper bracket is installed securely.
6. Install Headlight and Headlight Ring Mount
- Trim the headlight fins if necessary to fit the fairing.
- Install the headlight ring mount with blue Loctite.
- Tighten the headlight ring mount screws to the specified torque specifications.
7. Install Windshield
- Install the windshield using the provided hardware and gasket.
- Lubricate the gasket for easier installation.
- Snug up the center bolt of the windshield and then alternate working your way out.
- Tighten the windshield bolts to the specified torque specifications.
8. Test and Ride
- Make sure everything is secured and tightened properly.
- Take a test ride to ensure the fairing is installed correctly.
- Take note of any adjustments or modifications that may be needed.
Remember to always refer to the provided instructions for any specific details or torque specifications during installation.


